

Guide to Repair Outlet System Manager
As a System Manager this simple guide will help you to get the maximum benefit out of the service.
This is the first screen you will see once you have logged into 1link, from here you will be able to use all of the functionality detailed below:-
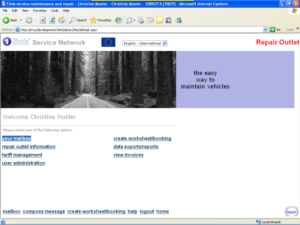
The Mailbox
The mailbox is the core of the 1link platform; here you will be able to find the details of all current jobs and future work bookings.
Once in the mailbox you will see that it is split into different sections. Floating your mouse over each of the icons below will identify what each icon represents:-

Inbox
All incoming messages from Scheme Operators (FMO’s) can be seen here.
![]()
Outbox
Rarely used, this section will display any message that has been sent via the “Compose Message” option.
![]()
Work Bookings
Any future work bookings can be found in this section. From here you can accept, amend or cancel any booking from any Scheme Operator.
![]()
Jobs in Progress
All jobs were the vehicle has been checked in and is currently being worked on can be found in the “Jobs in Progress” section.
![]()
Authorisation Pending
Any pending Authorisation requests can be found within this section until a Scheme Operator has either approved or declined the job.
![]()
Transactions for Payment
Once a job sheet has been completed, invoiced or cancelled, they will stay in this section until they have been marked as paid or archived after a period of time.
![]()
Repair Outlet Information
Within this section you can review and in some cases amend details relating to your repair outlet including opening hours and the franchises you currently hold.

Changes made within this section will affect how information is provided to scheme operators when they are looking for appropriate repair outlets within their supplier directory. It is therefore important to ensure that all of the required fields are completed to maximize how visible you are to the scheme operator community within 1link.
Remember to use the “Save Changes” option at the bottom of the screen if any amendments have been made before exiting this screen.
Tariff Management
Here you can set up your charge tariffs; these will be the rates that you will be charging any scheme operator who you will be carrying out work for.
Once you assign a tariff to a Scheme Operator, job sheets for that Scheme Operators vehicles will be automatically pre-populated with your agreed labour rates and parts discounts.
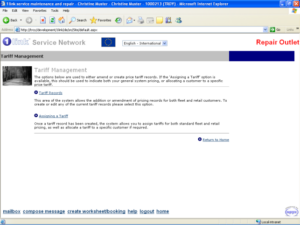
From here you can either create a new tariff or assign an existing tariff to a specific customer.
Selecting “Tariff Records” and “Add a New Tariff” will display the following screen


The first tariff record that is created will need to be the general pricing that you offer to your general customer base, you can add extra tariff’s at any future stage for specific fleets or customers by using the same method as above, these can then be assigned to individual
customers as shown in the next section.
Assigning Tariffs to Customers
From the Tariff Management screen select “assigning a Tariff” this will display the following screen.
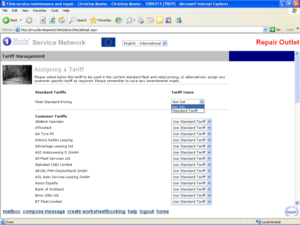
In the top highlighted field a default tariff record needs to be selected, this is the pricing that will be used for all scheme operators. If a special rate needs to be applied to an individual customer then this can be selected using the customer tariffs section against the relevant
customer and with the relevant tariff record.
NOTE: the tariff record will need to be set up before it is applied to an individual customer.
User Administration
When your repair outlet is initially set up by 1link Product Support you will have only one user set up at this point. To set up any additional users, the following procedure will need to be used.
From the home page select User Administration; this will display the following screen.
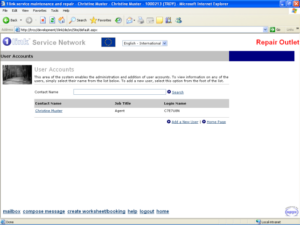
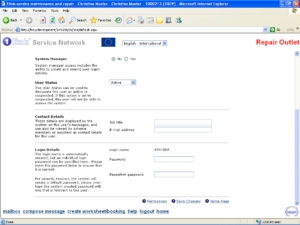
The first time you enter this screen you will only see the one user that had been set up by 1link Product Support. To create additional users, select “Add a New User”; the following screen will be displayed.

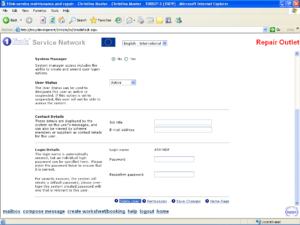
Set up all relevant details for each user required including a user name which will be displayed to other users of the system and a password as well. The system will assign a logon name automatically which cannot be amended by any user of the system or System Manager.
Note: A user should only be setup as a System Manager if they will need to be able to create and amend other users and their permissions, if you do not wish a user to have access to User Administration then select “no” for System Manager.
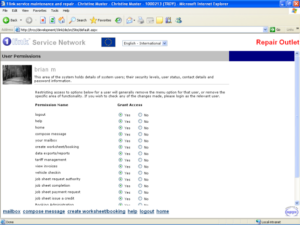
User Permissions
Once you have set up a user you will need to set up all of the relevant permissions for that user, this will deny or allow access to the different sections of 1link so this will depend on what responsibilities the user will have when using 1link.
At the bottom of the new user set up page select “Permissions”. The following screen will be displayed.
Here you will need to state whether or not a user has access to the different sections within 1link, setting these to “No” will either remove the functionality from that users log on or may grey certain sections out.
Once all permissions have been set use the “Save Changes” option at the bottom of the screen to confirm and save the details.
Amending current users
If you ever need to amend a user’s logon details or permissions then this can be done within the “User Administration” section and then clicking onto the user you need to change the details of.
To delete a user select the “Delete User” option at the bottom of the user details screen of the specific user you wish to delete.
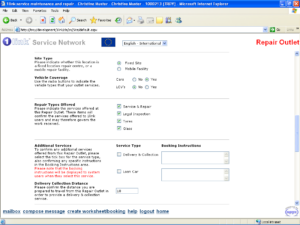
Create Worksheet Bookings
This is where you will set up any job sheets for work carried out on vehicles in your repair outlet. For more information on this procedure please see separate documentation provided – “Your Guide to Creating a Job sheet
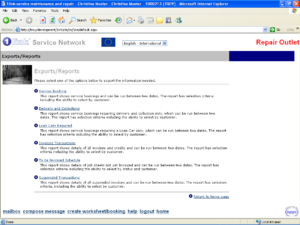
Exports/Reports
Within the 1link platform a suite of reports has been provided to supply information on all future bookings, current jobs and completed jobs, this section will explain how to run any of the reports/exports from 1link and download if required.
Selecting Exports/Reports from the home page will display the following suite of reports. To run a report, click the relevant heading which will take you to the following screen.
Depending on the chosen report a list of filters will be displayed. These will define the output of the report and remove any un-required data. Apply the selected filters and then click on ”Run Report”. This will display the filtered information.
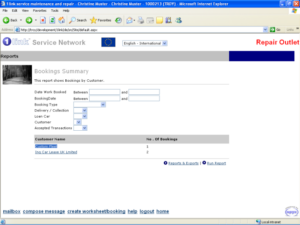
In some cases a further breakdown can be obtained by clicking on the relevant output line on the left hand side of the screen, in this case “Custom Fleet”.
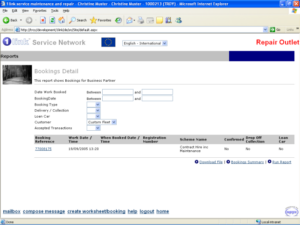
From this point the information can be downloaded and can then be imported into any 3rd party system such as Microsoft Excel for further analysis.
View Invoices
1link Service Network is a paperless system which means that you will never receive a paper invoice for any work billed to yourself or any work billed by yourself. 1link does however have the ability for you to view or print any copy invoices where required.
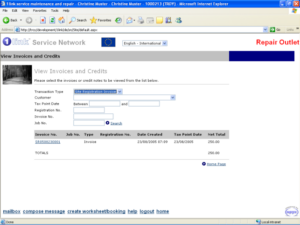
From the Home page select “View Invoices” this will display the following screen.
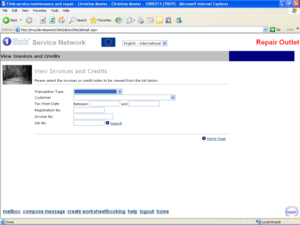
At this point the relevant selection criteria can be entered so that only the desired invoices will be
displayed. In the example below only the invoices that the repair outlet has been charged for registering a new site will be shown. This can be seen in the selection criteria as well as the output.
Where required a copy invoice can be printed by selecting the relevant invoice number from the right hand side of the screen. Clicking on this link will display a copy of the invoice with all required taxation details.